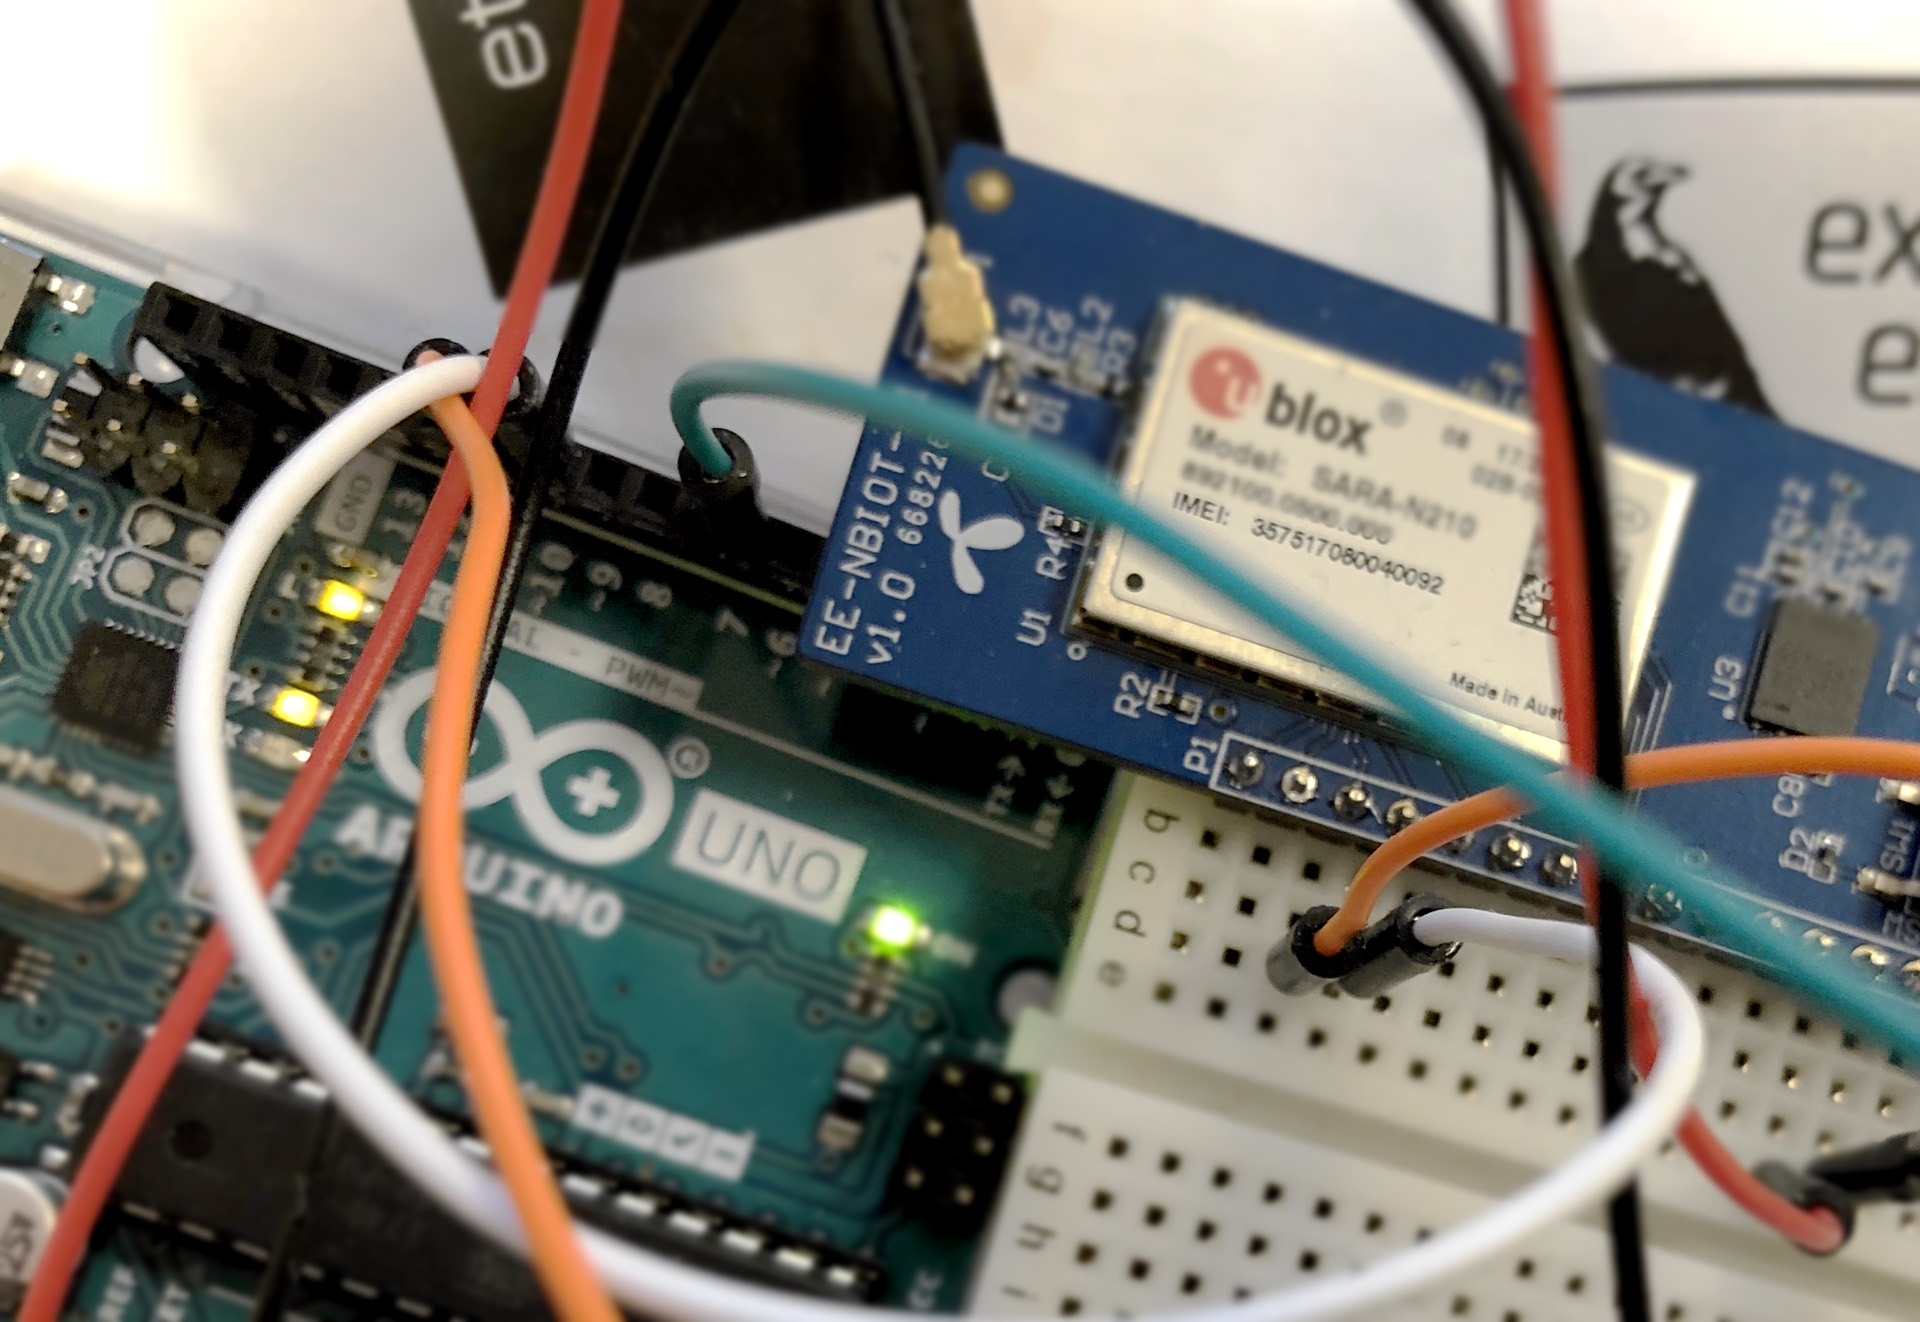
One of our latest projects is a breakout board for the uBlox SARA N2 module. The breakout itself isn’t very exciting – you’ve got a voltage regulator, uFl connector for the antenna, a sim chip, a reset button and the module itself. If you are anything like us you probaly want to pull out your little teal friend, aka “the Arduino” and test it out quickly before deciding to do anything further, preferrably without having to fiddle too much with AT command parsing. We all know how this is done but doing it is decidedly not the most exciting parts of embedded systems.
So I made an Arduino library for it. Using it is fairly simple: Download the zip file from the releases page on GitHub, install it into the Arduino IDE (Sketch|Include library|Add .ZIP file) and you are done!
We’ve added two examples - a simple hello world sketch that just connects, then sends a small string:
#include "TelenorNBIoT.h"

#define RX_PIN 10
#define TX_PIN 11

TelenorNBIoT nbiot = TelenorNBIoT(RX_PIN, TX_PIN);

void setup()
{
  Serial.begin(9600);
  Serial.print(F("Connecting NB-IoT module...\n"));
  nbiot.begin();
}

void loop()
{
  if (nbiot.connected())
  {
    Serial.print(F("Sending message...\n"));
    nbiot.createSocket();
    const char *hello = "Hello, this is Arduino calling";
    nbiot.send(hello, strlen(hello));
    nbiot.closeSocket();
  }
  else
  {
    Serial.print(F("Waiting for connection...\n"));
  }
  delay(10000);
}
…and a slightly bigger example where you can test out the module via short one-character commands.
Keen readers might notice that there’s no destination address here. We’re starting work on a new backend similar to the one we already built for LoRaWAN over at https://lora.engineering/. Right now it’s not even in early alpha but something will show up in a few weeks. Watch this space – there might be a blog post about it sooner or later.
If you hate the idea of having a backend forced upon you there’s a second option: Use the sendTo method on the nbiot class:
void loop()
{
  if (nbiot.connected())
  {
    Serial.print(F("Sending message...\n"));
    nbiot.createSocket();
    const char *hello = "Hello, this is Arduino calling";
    nbiot.sendTo("127.0.0.1", 12345, hello, strlen(hello));
    nbiot.closeSocket();
  }
  else
  {
    Serial.print(F("Waiting for connection...\n"));
  }
  delay(10000);
}
(Sending to 127.0.0.1 obviously won’t work)
The interactive example is a bit bigger so I won’t show it but if you upload it to the Arduino and launch the Serial Monitor at 9600 you’ll see this. Type a character in the input field and press enter to execute it:
=====================================
h. . . . . Display help
g. . . . . Check GPRS status (aka connected)
n. . . . . Create socket
c. . . . . Close socket
s. . . . . SendTo
r. . . . . ReciveFrom
i. . . . . IMEI
I. . . . . IMSI
x. . . . . error command
b. . . . . reboot
o. . . . . Go online
O. . . . . Go offline
=====================================
Module is online
IMEI = 357517080040092
IMSI = 242016000002300
Created socket
Data sent
Closed socket
If you press g you’ll see if the module is online. The first time you power it on it might take a few seconds to come online. Press n to create a socket, s to send a few bytes and c to close the socket. The IMEI and IMSI numbers can be retrieved by pressing i and I. The IMEI number should be printed on top of the module and is for all practical purposes the serial number of the module while the IMSI number is (again for all practical purposes) the serial number of the SIM connected to the module. Telcos likes IMSIs a lot since it is what identifies you and your subscription on the network.
I won’t bother you with an example of the module in use but there’s an example of it using an ultrasound sensor here: https://github.com/ExploratoryEngineering/hackathon/blob/master/ultrasound/ultrasound.ino
Enjoy!